

Wouldn't it be great to be able to keep a track of items you have to do on a project, along with having a record of what has been done in the past and who did it? That's what Tickets are for in Codebase. Once a ticket is created in Codebase you can discuss it with your team, and track it's progress through your workflow.
Milestones allow you to group tickets together and work towards a particular goal, perhaps the completion of a set of features or a version release. Using a milestone allows you to see the progress towards a particular goal as well as other useful information such as how much time has been spent working on it.
Creating Tickets
Your first step to creating a ticket is to open your project, hover over the tickets menu and click New Ticket, you'll arrive at the ticket creation page. You should enter a brief description for your ticket in the first box, this is what people will see when looking at a list of tickets. You can go into more in-depth details about your ticket in the box below. This could contain information such as any design or implementation decisions that have already been taken.
Choose the Status, Priority, Category and Ticket Type from the drop down menus if you wish to change them and assign a user responsible for this ticket if one has already been chosen. Press Create Ticket and your ticket will be stored and you'll be taken to it's page.
Attachments
If you'd like to attach a file to your ticket, for example a design mockup of an element, or a user log for a bug report, either choose the attachment tab and click Choose Files or just drag a file onto the page.

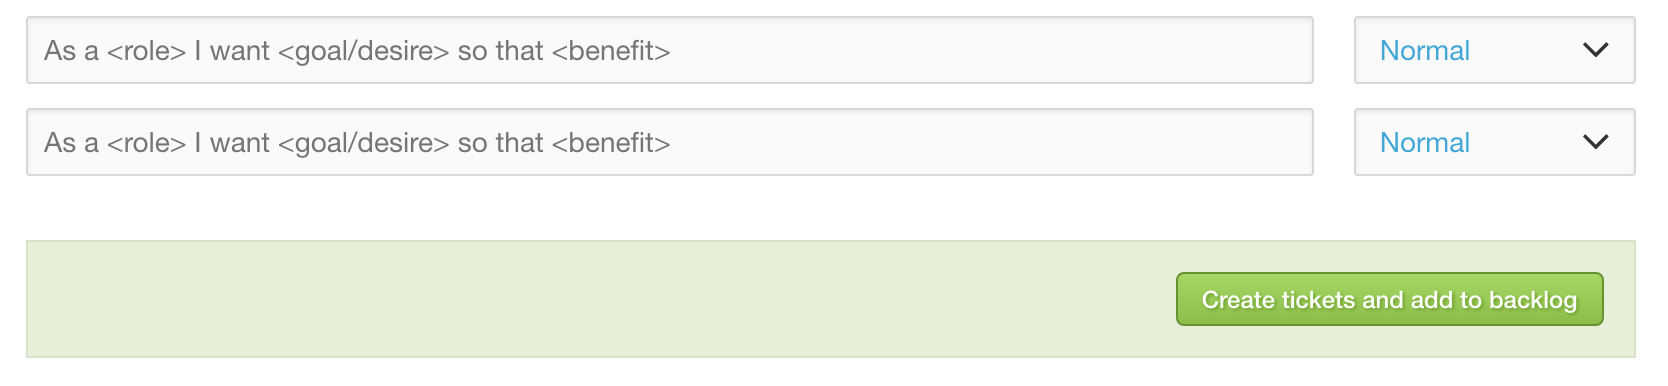
Adding multiple tickets
Your requirements gathering phase will probably generate a list of outlined features that you need to build. To get you up and running quickly, Codebase allows you to create multiple tickets at once.
If you'd like to add multiple tickets at once then select Add Multiple Tickets from the Tickets menu. This will take you to a page which allows you to either quickly enter a brief description and priority of a feature or, if you require more control, upload an entire spreadsheet with your tickets defined.
An uploaded spreadsheet must be saved in CSV format, and allows you to define more than just a simple description and status, your CSV should be in the format:
Description | Ticket Type | Status | Priority | Assignee | Est. Time to Complete (mins or hh:mm)
These fields are also described at the top of the add multiple tickets page, along with the valid values for the Type, Status, Priority and Assignee based upon your project. Just click the Choose File button and select your CSV and click Upload. All of the tickets described in your CSV will be automatically created.
Contributing, Updating and Ticket History
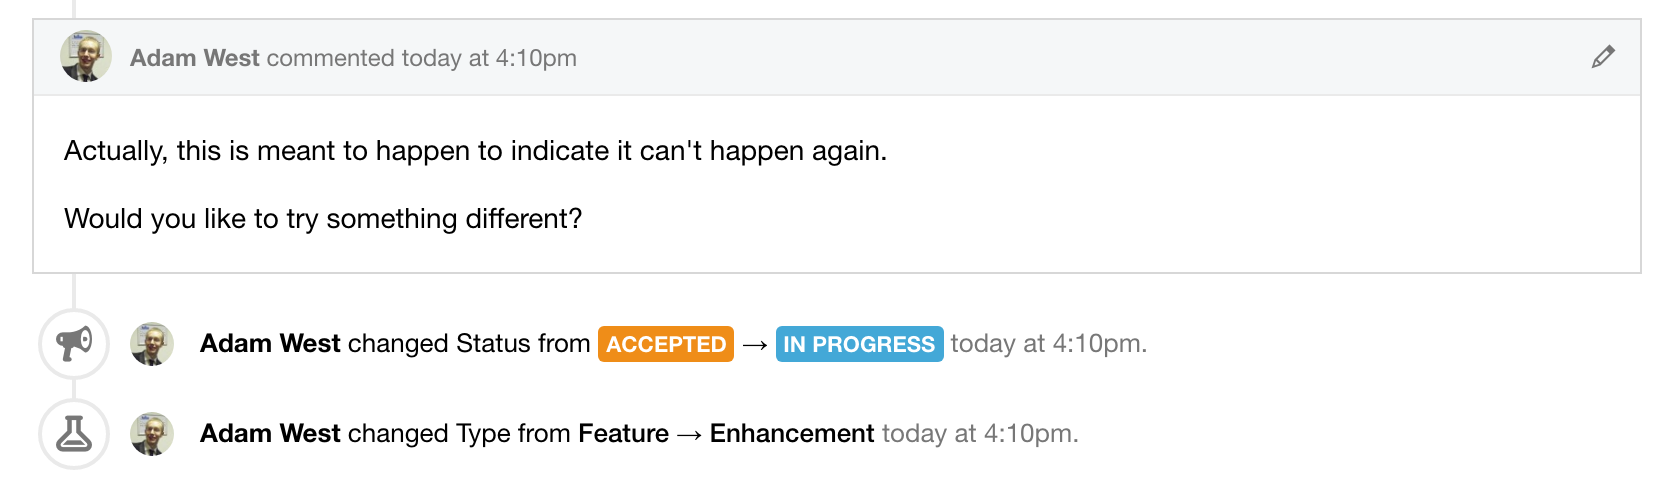
After a ticket is created, it can be contributed to by other members of the project. Opening the ticket will display the ticket history up until now. At the bottom of the page you'll find the section for updating the ticket. Here you can add your own comments to a ticket as well as adjust the other properties of the ticket.
Adding a Comment
Scroll to the bottom of the ticket page and in the box enter the comment you wish to add, you can format your comment using Markdown or the provided editing tools bar. While you're making your comment you can also update properties of the ticket such as the status or priority. Clicking Post Update will add your comment to the ticket's history.
If you've made a mistake on your comment it's okay, you can edit it for up to 15 minutes by clicking the pencil icon on the comment.
Closing a Ticket
Ticket Statuses can either represent an open or a closed ticket. By default, Completed and Invalid mark a ticket as closed, and New, Accepted and In Progress statuses represent open tickets.
To close your ticket (or re-open one) just change the Ticket Status to the appropriate one from the update form at the bottom, or by clicking on the ticket status in the ticket header.
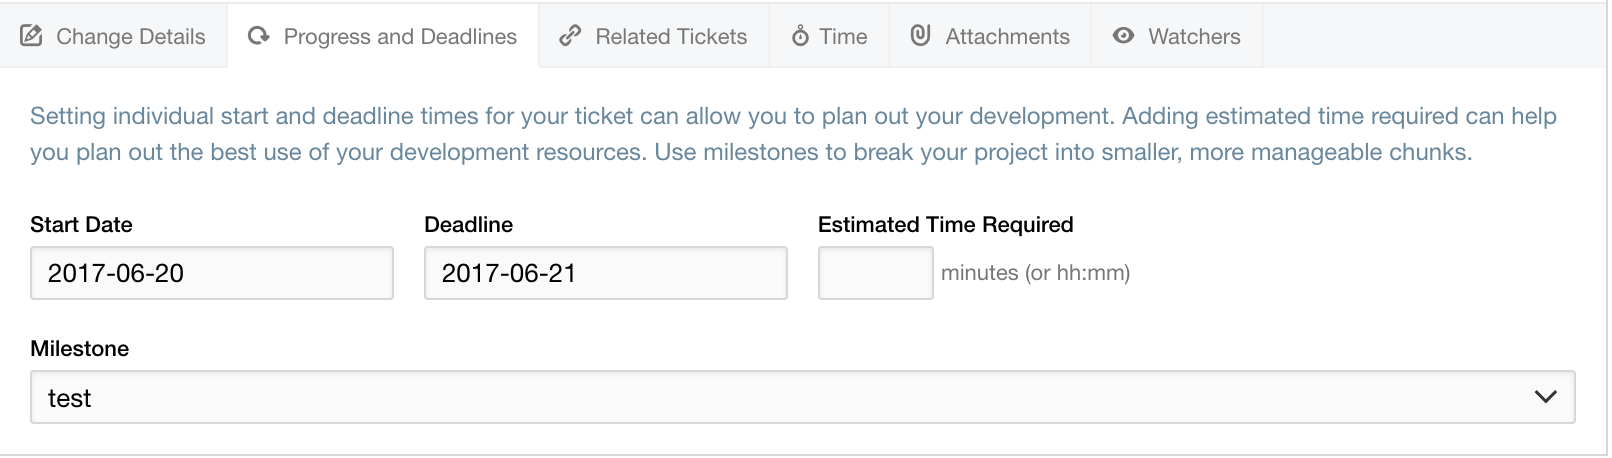
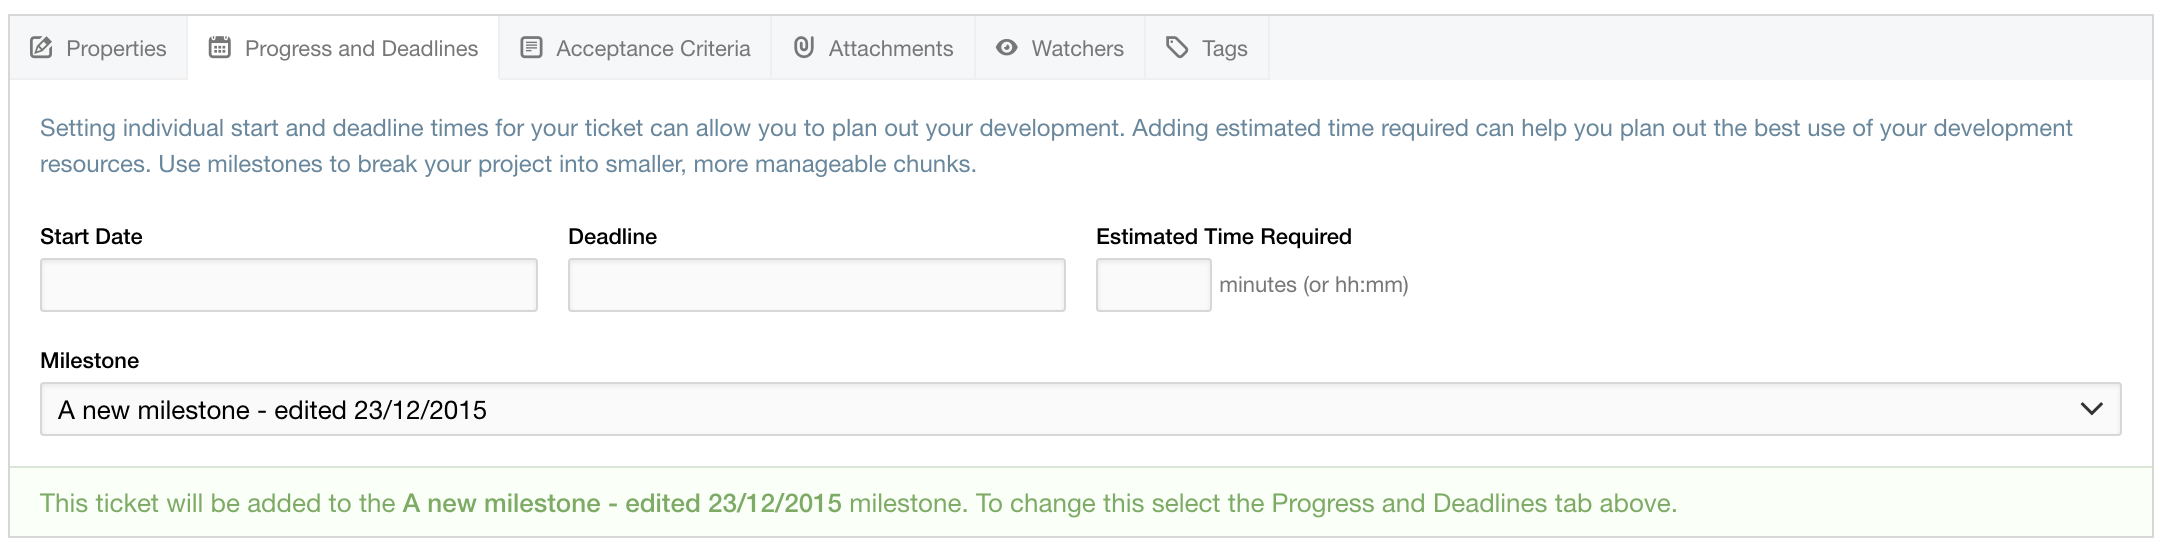
Progress and Deadlines
One of the tabs on the ticket update form represents the ticket's relationship with project milestones, and timing information such as deadlines and estimated time to completion. To update any of these properties, just click on the tab and fill out the fields.
Ticket Reports
Codebase offers you powerful tools for viewing and filtering your tickets. From the Tickets menu in your project you'll see the sub-section of Browse Tickets. By default this menu contains several default reports, All Tickets, My Assigned Tickets, My Reported Tickets, Open Tickets and Closed Tickets.
Selecting one of these reports will display the matching tickets for that report in a list format.
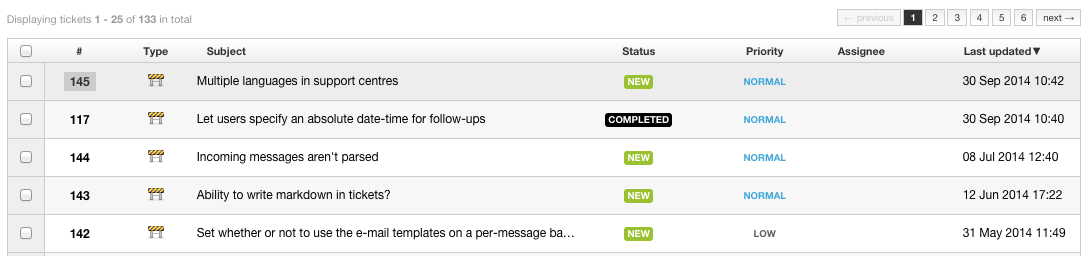
To open a ticket just click on the ticket number or the subject. If you wish to resort the ticket list, click the relevant column at the top of the list.
Quick searching
Above the list of tickets you will see the search bar. You can use this to perform quick searches on your tickets. For example, if you want to quickly view all of the tickets with the status Invalid you can enter status:invalid. For a full list of queries that can be performed with the quick search click Help next to the search bar.
Advanced searching
Although quick searching is great for matching simple pieces of data, sometimes you might need to search on a range, or check for the presence of a field. This is where advanced searching is useful. As well as more powerful queries, you can specify which columns you'd like to see, how many results are returned and how the data is sorted. To get started with an Advanced search, just click Advanced next to the quick search bar.

Here I've created a search to find all of the tickets assigned to me that have a deadline today. We've also chosen to sort the tickets by priority. You can add additional conditions by clicking the green plus, and remove existing conditions by clicking the red minus.
Saving your searches
If you've got a helpful query that you'd like to save for future use, scroll to the bottom of the ticket list and click Save as new search in the yellow box. This will give you to save the search as a new report either just for yourself, or for all users on your account.
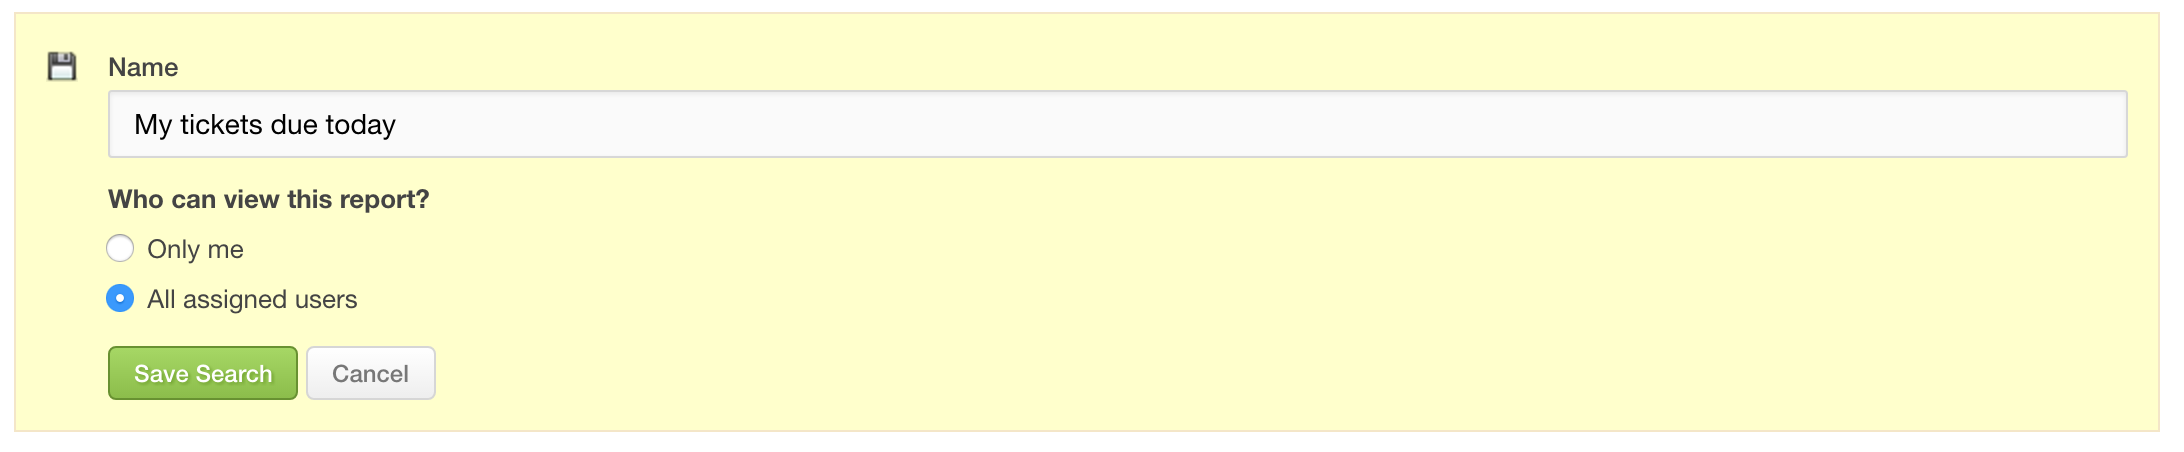
These saved reports will then show up in the Tickets menu after the default reports.
Using Milestones
Milestones allow you to track the progress of your project, using tickets towards a particular goal. To set up your first milestone select Milestones from the Project Progress section of the Tickets menu and select New Milestone from the top right.
The New Milestone page allows you to enter a name and description for your milestone, along with a few other useful pieces of information such as who is responsible overall of the progress of the milestone, and the start date and deadline for all work to be completed by.
It's also possible to nest milestones to make them a sub-set of another milestone. To do this, just select the parent milestone when creating your new milestone.

Adding tickets
You can quickly add tickets from the Milestones page by clicking the + New button on the milestone you wish to add a ticket to, however if you prefer you can add a ticket to a milestone when creating a new ticket from the Tickets menu. Just select the Milestone and Dates tab when adding your ticket and select the milestone you wish to add the ticket to. You can also do this to existing tickets to retrospectively addd them to a milestone.
Tracking progress
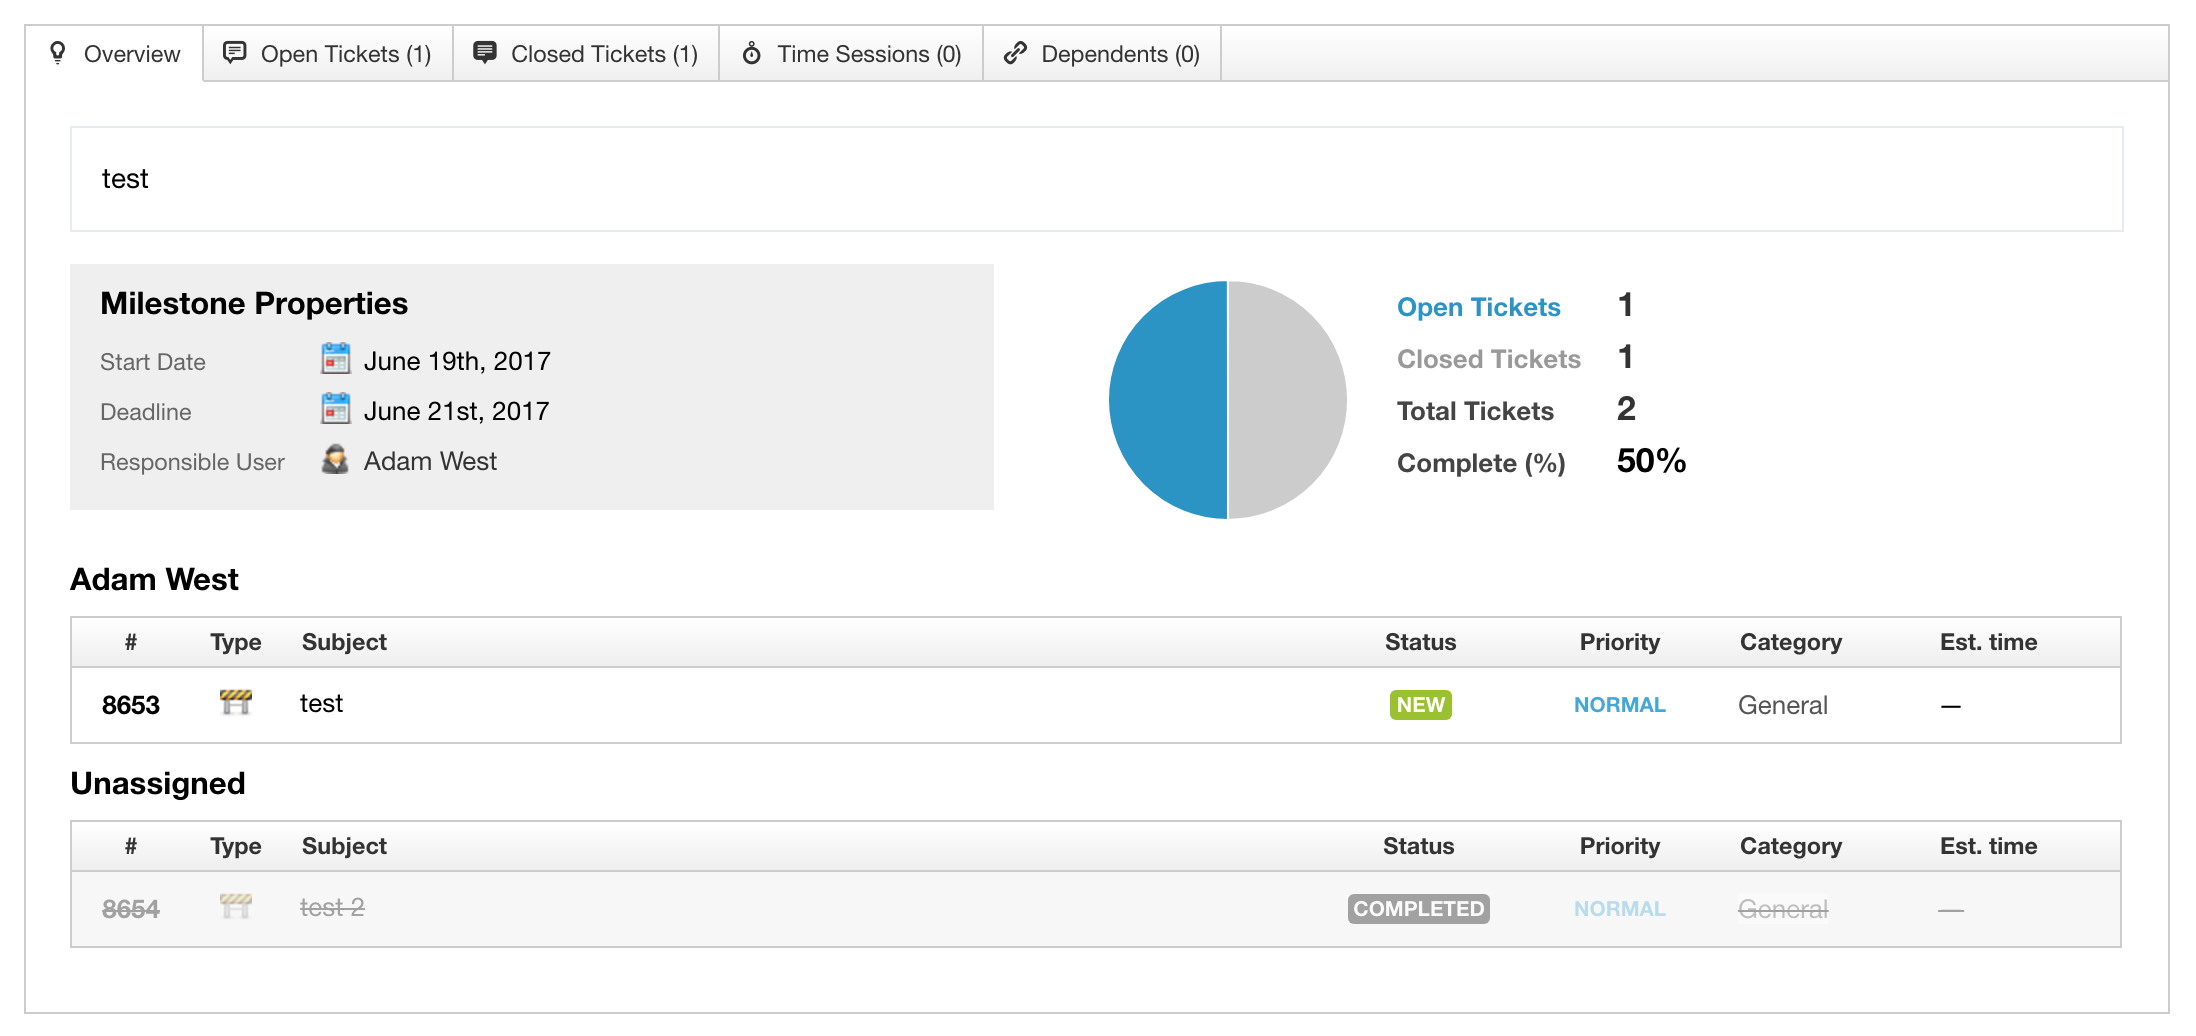
It's easy to see how your milestone is getting on, your upcoming milestones and their deadlines are shown on your project overview page. Clicking on that milestone will take you to it's overview page, where you can see a chart showing your progress, as well as a list of completed and incomplete tickets, grouped by assigned user.
Once a milestone has been completed click the Mark as Completed button at the top and the milestone will no longer show up in your project overview.
Summary
Tickets and Milestones together give you a powerful way to plan and track the progress of your project through its lifecycle. From initial requirements gathering to retrospectively reviewing your performance, tickets and milestones work together to give you a flexible view of your project.
